.svg)





In August, OpenAI announced it was expanding its ads capabilities to 31 European markets, and companies have since started running campaigns through their self-service Ads Manager.
What about user consent, and how do you manage it? This article presents how Didomi can help.
How do ads work on ChatGPT?
ChatGPT Ads lets brands display sponsored placements inside ChatGPT, labeled as ads and shown separately from the answers, and only for the Free and Go plans.
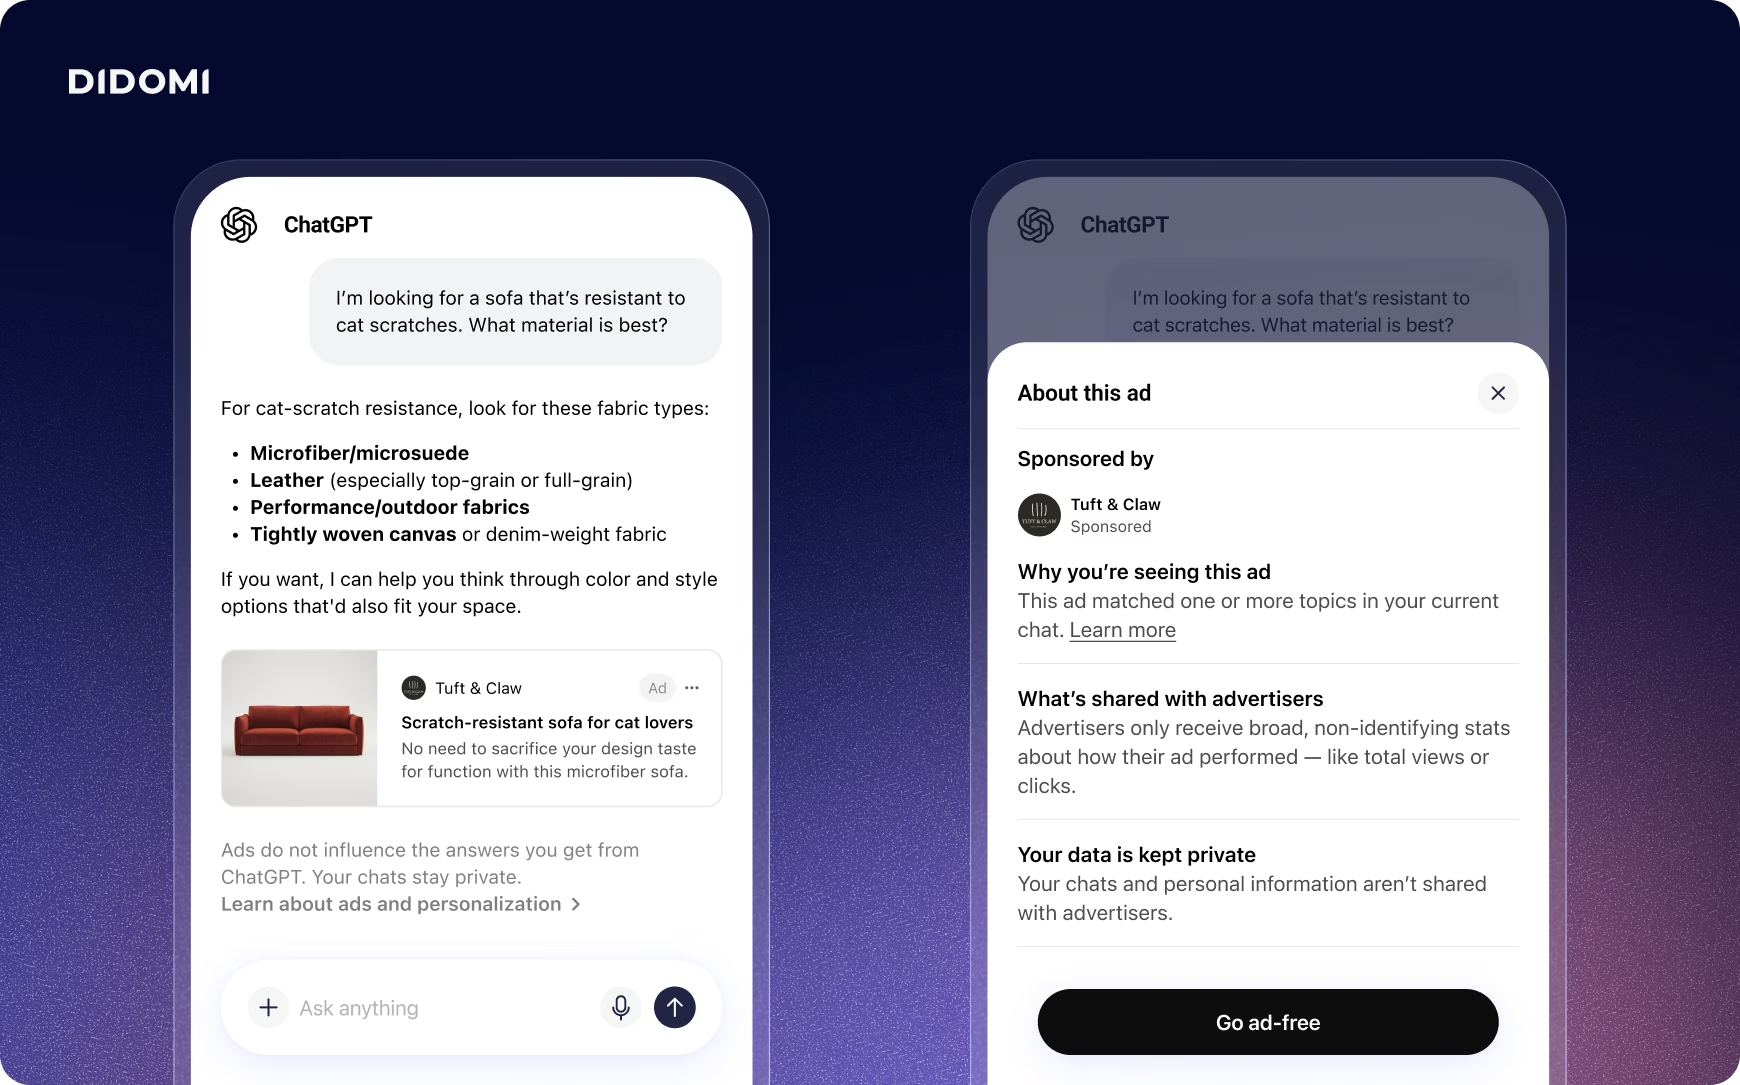
Advertisers can build campaigns in ChatGPT’s Ads Manager, which offers settings for geo-targeting, custom audiences, and conversion- and click-based bidding. As with any ad platform, assessing campaign success relies on measurement; to that end, OpenAI provides a pixel brands can use.
The OpenAI Pixel is a script that runs on the advertiser’s website and reports events such as purchases or sign-ups, tying conversions back to specific campaigns. Because the pixel runs on it, the website decides when it loads, and this is where consent comes in.
How does consent work with OpenAI Ads and Didomi?
According to OpenAI’s documentation, the OpenAI Pixel assumes that the visitor has agreed by default, setting measurement consent to true unless the site sets it to false or the pixel finds a stored refusal.
This means consent handling is the advertiser's responsibility and comes down to three things: declare OpenAI as a vendor in the consent banner along with the purposes it serves, collect users’ choices with your CMP, and ensure the pixel respects those choices.
To ensure it does, you can either have your tag manager hold the pixel back until the visitor has consented to OpenAI (so the script does not load at all beforehand) or, if the pixel is added directly in your website’s code, you can use the consent settings provided by OpenAI and set consent to false before the pixel initializes, then true once the visitor agrees.
Setting up OpenAI Ads consent settings in Didomi
You can set up your Didomi Console and ChatGPT settings to ensure consent is taken into account in a few steps:
- Add OpenAI as a custom vendor: In your Didomi Console, add a new vendor in the Vendors tab of the Data Manager. Find out how here.
- Link OpenAI to a purpose, with consent as the legal basis: Choose a purpose that describes what OpenAI does with the data. An example could be something like: Measure advertising performance.
- Add the vendor to your consent notice: Add OpenAI to the vendors of the banner displayed on your website. Note: Depending on your setup, Didomi can re-collect consent when new vendors or purposes are added.
- Condition the pixel on consent: If the pixel is installed directly on your site, use OpenAI’s consent setting, and switch it to true when visitors consent to the vendor. If you’re using Google Tag Manager, create a trigger based on the OpenAI vendor and add it to the pixel tag through a trigger group, so the tag only fires when visitors have consented. Read our documentation on blocking tags for more information.
Once the setup is complete, make sure to test it yourself before launching by opening your site in a private window, declining the consent banner, and confirming in the Conversions tab of the OpenAI Ads Manager that no events arrive from your site. Then accept, and confirm they appear.
How to track conversions accurately using server-side tagging
Consent determines what you can measure, but it isn't the only factor in how much you can capture. Because the pixel runs in the browser, ad blockers and browser restrictions can stop it from reporting on conversions. To help with that, OpenAI also offers a Conversions API, which lets your own server send the same events directly and is a more reliable source than the pixel alone.
To understand how the pixel and the Conversions API work together and how server-side tagging can help with conversion tracking accuracy, check out our guide on the Addingwell website:
{{ChatGPT-ads-server-side}}